


In this video tutorial, we will show you how to rotate the north arrow in cadvilla. In addition, we will explain what effects this has on the light and shadow calculation in your project.
Below is a rough overview of the video’s content.
1. Preparations for the light and shadow calculation
To optimally see the effects of the rotation, you need to prepare the view and the sun position.
[07:51] Activate presentation mode
- Right-click on the desired 3D view and select
Properties.... - Go to
Appearanceon the left and select thePresentationoption underMode. This makes shadows visible in the 3D view.
[01:49] Activate calculate sun position
- Switch to the
Sun positiontab on the left in the same properties window. - Deactivate the
Use default settingsoption. Important: If this option is active, rotating the north arrow will have no visible effect on this view! - Instead, activate the
Calculate sun positionoption.
[02:32] Define light and time
- As soon as the calculation is active, you can set exact values in the
Sun positionmenu. - Select your location, date, and
Time(e.g.,09:00). - If necessary, adjust the
Light colorandLight intensityfor the sun andEnvironment light. Confirm withOK.
2. Move and rotate the north arrow
From cadvilla version 11:
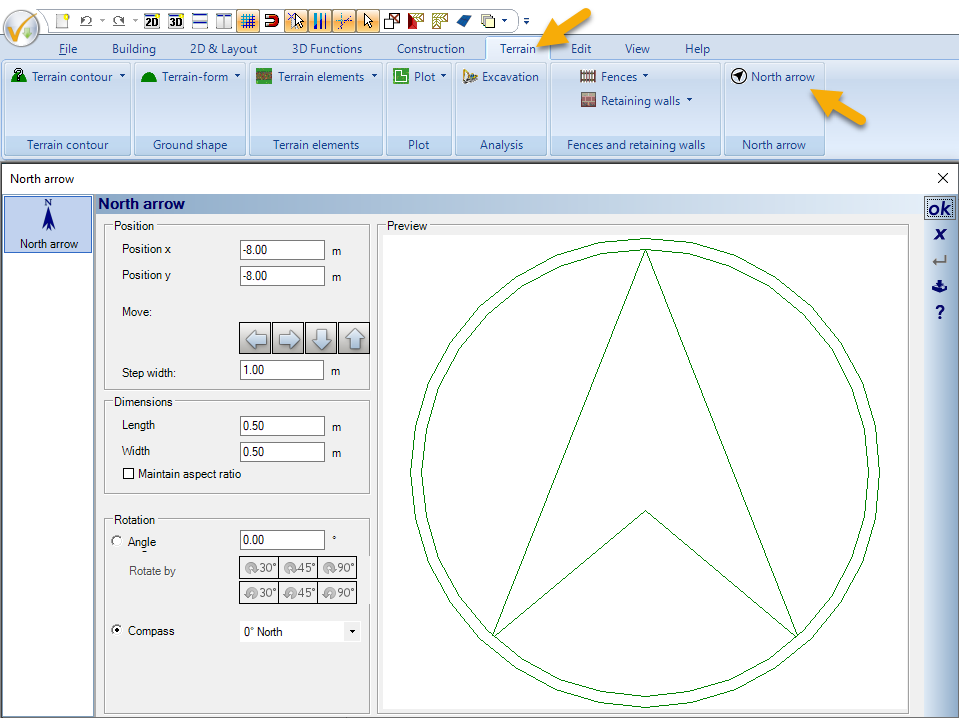
- From version 11 onwards, cadvilla has a dedicated dialog box for these settings. You can find this dialog in the top menu under
Terrain>North arrow.
Up to cadvilla version 10 (also shown in the video):
[04:13] Select the north arrow
- Hold down the
CTRLkey and select theEnvironmentlayer in the project window. - Then click on the north arrow in the 2D view with the left mouse button.
[04:38] Move the north arrow
- Press the shortcut key
r(Move with reference point). - Click on an empty area next to the arrow and drag it to the desired new position.
[05:25] Rotate the north arrow
- Right-click on the selected north arrow and choose
Properties.... - In the new window, enter the desired rotation under
Angle(e.g.,90.00degrees). This rotation determines your north alignment. - Click
OK. The light and shadow situation in the 3D view will now adjust immediately.
3. Hide and show the north arrow in a 2D view
[08:56] Open visibility
- First, press the
ESCkey to clear all selections. - Right-click on an empty area in the background of the 2D view and select
Visibility....
[09:06] Hide or show the north arrow
- In the
Visible categoriesdialog box, locate theNorth arrow(usually found under2D Graphic elementsor auxiliary elements). - Remove the checkmark next to
North arrowto hide it. Check the box to show it again. - Confirm your choice with
OK.