

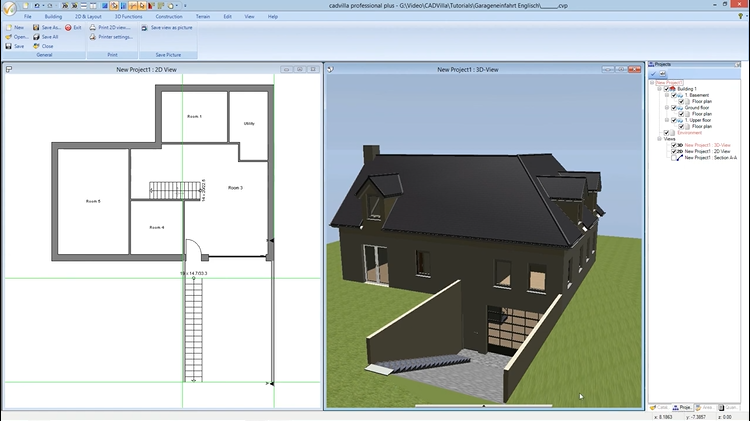
Are you looking to design a realistic garage driveway or a staircase down to your basement in your 3D house planning? In this step-by-step video tutorial, we show you how to implement these elements professionally using the cadvilla software. You’ll learn how to place garage doors and stairs, draw retaining walls, and precisely cut out the terrain using subtraction solids. Finally, you can add the finishing touches to the driveway by applying suitable paving textures.
Please note that some of the shown functions (like extrude solids and subtraction solids) are only included in the cadvilla professional and cadvilla professional plus versions.
Note: The zoom functions demonstrated in the video are only valid up to version 5. In newer versions, you can zoom simply by scrolling the mouse wheel. For further details, please refer to our post on zooming in the 2D and 3D view.
1. Inserting the garage door, door, and stair departure
In our example, we are creating the garage entrance on the Layer “1. Basement“.
[00:21] Short introduction to the shown functions
- Deselect the grid and line width to be able to catch points and orient yourself better.

[01:34] Position the door to the garage
- Select
Building>Door>Door>Free positioning. - Before placing it in the 2D view, press the right mouse button and select
Properties. - Open the point
Selection. UnderInterior doors, choose the typeDoor whitewith a double-click. - Check the dimensions (e.g. width 0.75 m, height 2.00 m) and confirm with
OK. - Up to V9: Press the key combination
CTRL+Wto change the reference point of the door to the lower right corner. - Up to V9: Make a right-click and select
Constructional support>Point with distance from. Click on the outer corner of the wall. Enter0.10(for 10 cm) as the distance and confirm withOK. - From V10: Position the door with a left mouse click at the desired position. Afterwards, select the door and change a dimension shown on the dimension line by clicking the
±symbol to define the exact position of the door.
[03:41] Insert garage door
- Go again to
Building>Door>Door>Free positioning. - Open the
Propertiesin the 2D-view (right mouse button). UnderSelectionin the folderGarage / Industrial doors, choose theRoller shutter door 3.5m,2.5m. - Change the width to
3.30m and the height to2.70m. Confirm withOK. - Up to V9: Change the reference point again with
CTRL+W. - Up to V9: Use the function
Point with distance fromagain (shortcutA). Click on the corner of the wall, enter0.10as the distance and confirm withOK. - From V10: Position the garage door with a left mouse click at the desired position. Afterwards, select the sectional door and change a dimension shown on the dimension line by clicking the
±symbol for the exact position.
[06:14] Adjust the 2D display of the garage door
- In the 2D view, the door often protrudes beyond the wall. Select the door and open the
Properties(right mouse button). - Go to
Top view. UnderDisplay type, choose theWire framepoint and clickOK.
2. Create side walls and stairs
[07:54] Set guidelines for the side walls of the garage descent
- Switch back to the 2D view.
- Press the shortcut
Pfor the functionNumeric parallel guideline(parallel guideline with distance). - Click on the left vertical wall and enter the distance
0.00. Repeat this for the right vertical wall. - Click on the lower horizontal exterior wall. Enter
7.00(for 7 meters) as distance and pressEnter.
[09:32] Draw side walls of the entrance
- Select
Building>Walls>External wall>Between two points. - Open the
Properties(right mouse button). Set theThicknessto0.15m. - Under
Layer construction>Standard Masonry>2D Display, you can change theMonochrome Fill colorto aGrey. Confirm three times withOK. - Click on the intersection of the guidelines. Press
CTRL+Wto correctly align the reference point of the wall. Then click on the upper corner of the basement wall to finish the wall. Repeat this for the second side.
[11:37] Enter and adjust stairs
- Select
Stair construction>Straight stair. - Click on the start point at the guideline. Change the reference point with
CTRL+W, so that the stair lies directly on the inside of the side retaining wall of the garage entrance. Click on the inner corner of the wall to the garage entrance as the end point. - The straight stair dialog opens automatically. Click on the
3Dsymbol for the preview. - To remove the handrails, click on the left on
Handrail - Leftand remove the checkmark atCreate handrail. Repeat this forHandrail - Right. Confirm withOK.
3. Create extrude solid for the terrain cutout
We now need an extrude solid to cut away the terrain in the area of the driveway.
[13:44] Create a section view
- Select
View>New Section View. - Click on the lower left and then the upper right corner of the entrance. The section view opens in a new window.
[15:13] Select the “Environment” layer for the terrain cutout
- The solid for the terrain cutout must be on the correct layer. Hold down the
CTRLkey and click on theEnvironmentlayer in theProjectswindow (on the right).
[16:34] Draw an extrude solid for the garage descent
- Select
Construction>Extrude solids>Insert with polygon. - Click on the corner points of the entrance in the section view to trace the shape.
- Before completing, press the right mouse button and select
Properties. - Under the point
Height/Depth, enter the exact width of your garage entrance (e.g.5.20m). Confirm withOK. - Press the right mouse button and select
Complete.
4. Convert extrude solid into a subtraction solid
[18:22] Convert to subtraction solid
- Select the recently drawn extrude solid in the section view or 3D view.
- Press the right mouse button and select
Convert to subtraction solid. The terrain is now cut out.
[19:00] Hide subtraction solid in 3D
- The red cutting solid is distracting in the 3D-View. Right-click there and select
Visibilities. - Open the
3D Objectsarea. Remove the checkmark at3D subtraction solidsand confirm withOK.
[19:28] Correct the layer properties of the subtraction solid
- If the solid is on the wrong layer, it might cut out the wrong terrain.
- Select the subtraction solid (e.g., in the section view). Make a right-click and select
Properties. - In the properties, open
Intersection with construction elements(Object selection). - Choose the option
on selected layersand mark theEnvironmentlayer. - Open the point
Select type. - Deselect all types except for the
Terraintype (Select ⇾ None ⇾ Terrain). - Confirm with
OK. Close the section view afterwards and, if necessary, delete the section symbol.
4. Texturize the garage descent
[22:56] Apply paving stones
- Switch to the
3D View. - Open the
Catalogpanel on the right side of the screen. - Navigate to
Textures>Exterior>Pavement. - Choose a suitable texture. Simply drag and drop it with the left mouse button pressed onto the floor surface of your garage entrance.
- Finally, press the
ESCkey to end the function.