


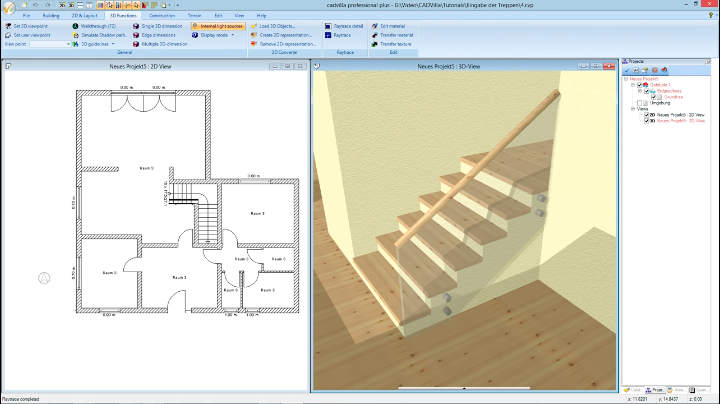
In this comprehensive video tutorial, we will explicitly show you how to enter a L-shaped stair with a landing using the 3D home design software cadvilla, based on a sample floor plan. Furthermore, we will demonstrate how to place a partition wall seamlessly underneath the staircase. Finally, you will learn step-by-step how to construct a custom glass railing, completely equipped with a matching handrail and mounting bolts. By following these precise instructions, you will be able to design complex architectural features efficiently.
Here is the basic workflow summarized in easily digestible steps:
1. Entering a Stair with Landing
[00:34] Selecting and Placing the Stair
- Deactivate the grid (
Grid off) and the line width (Line width off) to be able to snap and orientate yourself better.
- First of all, navigate to the top menu and select
Building>Stair Construction>Stairs with Landing. - Following that, choose the first starting point of the stair directly in the floor plan. The stair will now be attached to your cursor.
- Pro Tip: By pressing the key combination
CTRL+W, you can easily change the reference point of the stair (e.g., to a specific corner). Consequently, this allows you to place the element precisely where you need it. - Next, click to input the additional corner points of the stair run.
- After placing the final point, simply press the
right mouse buttonand clickCompleteto finish the input phase.
[01:40] Defining the Stair Properties
Immediately after placement, the dialog box for the U-shaped stair opens automatically. Inside this window, you can adjust the following crucial settings:
- Dimensions (Geometrie): Enter the desired
Widthof the stair. Consequently, theLength, theTread deep(tread depth), and theNumber of stepswill be calculated automatically by the software. - Heights: Under the heights section, you can confidently define the overall
Stair heightor theHeight in top step. We highly recommend checking the box forAutomatic positioning above constructionso that the stair height adapts perfectly to your floor level. - Style: In this tab, you can select your preferred
Stair type(e.g., a solid or wooden stair). Furthermore, you can adjust specific measurements likeStep offset,Cover thickness, andWalk-plank thickness. A quick click on the 3D button in the preview window will activate a helpful 3D preview. - Landings: Here, you have the option to specify rules such as the
Min. distance between landing. - Railings: Navigate to the
Handrail - LeftandHandrail - Righttabs. Since we are going to construct a custom glass railing later, you should uncheck theCreate Handrailoption on both sides. - Wellhole: Under the wellhole section, ensure that
Automatic wellholeis checked so the ceiling opening is generated by the system. Alternatively, you can deactivate the automatic wellhole and enter it manually viaBuilding>Cut-Out>Ceiling Cutout.
Once you are satisfied, confirm your meticulous settings by clicking OK. If you need to edit the stair later, simply re-select it, right-click, and choose Properties.
[05:37] Explanation of Geometry Parameters: At this timestamp, the video briefly revisits the geometry parameters to explain how Length, Tread deep, and the Number of steps interrelate. Ultimately, the total number of steps automatically dictates the rise of each individual step.

2. Entering the Wall Underneath the Stair
[06:48] Inserting a Partition Wall
- To close off the space beneath the staircase, head to
Building>Walls>Partition wall>Between two points. - Before actively drawing the wall, press the
right mouse button, chooseProperties, set the exactThickness(e.g., 0.25 m), and hitOK. - Now, carefully place this partition wall in the open area beneath the stair (usually aligned with the outer edge).
- Advantage: Unlike standard walls, partition walls do not blend or merge automatically at the corners, which is the exact behavior we want to achieve in this particular scenario.
[08:06] Adapting the Wall to the Stair Profile (Wall Cut-Out) Because the newly placed wall likely protrudes above the steps, the excess areas must be meticulously cut away.
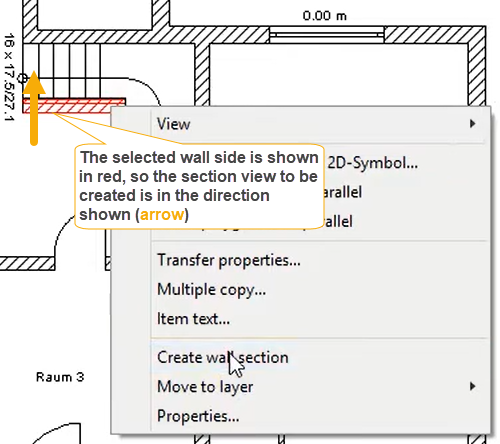
- First, select the partition wall on the bottom edge. The selected wall side is red marked. Then, click the
right mouse buttonand chooseCreate Wall Section. Subsequently, a 2D side view of the wall will open.
- Next, navigate to
Building>Cut out>Wall cut-out>Insert with polygon. - Carefully draw a polygon encompassing the exact area extending above the stair treads that needs to be removed. Important Note: Make sure that when clicking the points, your cursor always stays inside the wall boundaries; otherwise, the software cannot detect the cut-out correctly.
- Once the shape is closed, press the
right mouse buttonand clickComplete. - [09:47] Finally, you can delete the section view symbol in your 2D plan, as the temporary section view is probably no longer needed. Just highlight the symbol, press
DELETE, and confirm withOK.
3. Creating the Custom Glass Railing
[14:03] Constructing the Glass Surface Element
- Create a section view of the stair and use guidelines to define the intersection points for the railing.
- To begin, navigate to
Construction>Single 3D surface>Insert with polygon. - Initially, you must define the reference plane in the 3D view to which the railing should lie parallel (e.g., the side surface/stringer of the stair). Left-click the surface to confirm.
- Now, carefully click points to draw the polygon outline representing the actual shape of the glass pane.
- After the last point, press the
right mouse buttonand selectComplete. - A dialog will pop up where you can accurately define the
Thickness(e.g., 0.04 m) of the pane and itsDistance from plane. Confirm by hittingOK.
[16:56] Assigning the Glass Material
- Switch your perspective to a comfortable 3D view of the newly created pane.
- Navigate to the top ribbon and select
3D Functions>Edit material. Click directly on the surface element. - Inside the material editor, you need to right-click the
Texturethumbnail and clickRemove Selection. - Afterwards, change the
Colorto a light blue or silver tint and increase theTransparency %to approximately 70%. Confirm withOK.
4. Constructing Mounting Bolts and the Handrail
[17:50] Creating Mounts Using Cylinders
- Proceed to
Construction>Primitives>Cylinder>Free positioning. - Right-click right away to open
Properties, set the appropriate dimensions (RadiusandHeight), and clickOK. - Place the cylinder precisely on the drawing. Using the right-click menu, rotate it accordingly (e.g., around the X-axis) so it acts as a mounting bolt.
- [19:35] Once the first cylinder is perfectly positioned, select and right-click it and choose
Multiple copy. Specify theNumberof copies and theEnter distancebetween them to instantly distribute the mounts along the stair layout. Confirm withOK.
[20:19] Creating the Handrail (Sweep Solid)
- Go to
Construction>Sweep Solid>Insert with polygon. - In the 3D view, select the face running parallel to where the handrail will be (e.g., the glass pane).
- Before drawing the path, right-click to open
Properties. Inside the dialog, browse the catalog for a suitableProfile(e.g., a round handrail) and define itsWidthandHeight. PressOK. - Now, carefully draw the path line denoting the handrail’s trajectory. Once finished, click the
right mouse buttonand hitComplete.
[22:28] Transferring Materials
- In order to unify the look of your design, utilize the
Transfer materialtool found under3D Functions. - First, select your styled object (e.g., a stainless steel bolt or the newly painted handrail) to pick up the material. Then, simply click on all the remaining target objects that should adopt the exact same finish. Confirm your actions with
OK.