

Are you looking for a precise way to enter interior walls in your cadvilla floor plan? This comprehensive tutorial guides you through the exact placement of supporting and non-supporting walls using guidelines and numeric input. Learn how to adjust wall thicknesses, change reference points, and optimize your 2D view for a professional result. Follow our step-by-step instructions to master the wall construction tools and avoid common planning mistakes.

Below we describe the most important points (with timestamps in the video) shown in the tutorial.
1. Preparation of the working environment
[00:38] Deactivate grid and line width: To ensure better orientation and snapping accuracy, first deactivate the grid (Grid on/off) and the line width (Line width on/off) via the 2D & Layout tab at the top of the screen.

[01:10] Set up guidelines: Guidelines are created via the menu 2D & Layout > 2D guidelines > Guideline > Numeric parallel guideline (or shortcut P). To increase clarity, you can customize the color of the guidelines: Right-click on a guideline > Properties > Appearance > Color and select a new color.
2. Input of supporting interior walls
[03:09] Create vertical wall
- Define the guidelines for entering the first interior wall.
- Optional: Add the wall thickness with a second guideline (distance: -0.25 m).
- Select the menu
Building>Walls>Supporting wall (Interior)>Between two points chain. - Before drawing the wall, change the wall thickness via
Right-click>Propertiesto, for example, 0.25 m. - Important: Change the reference point of the wall segment (left/right/center) during input using the keyboard shortcut
Ctrl+Wto align the wall correctly with the guideline.
[06:04] Create horizontal walls
- Similar to the vertical wall, create guidelines for the horizontally aligned wall (e.g., distance -3.75 m).
- The input is also done via
Building>Walls>Supporting wall (Interior)(or quickly via theLastest actionsbutton).
[08:44] Enter walls with the “Point with distance from” function
- Use additional constructional support here to define precise distances (e.g., 4.30 m).
- Position the wall exactly using the
Right-click>Constructional support>Point with distance fromfunction. - Note: From version 10 onwards, the shown function for “Tool options” no longer exists in this form. Instead, you can first position the wall approximately, then select it, and enter the exact dimension directly by clicking on the displayed dimension chain.

3. Input of non-supporting interior walls
[16:08] Manage guidelines (Deleting Wizard)
- Delete guidelines that are no longer needed using the
Edit>Deleting Wizard(Help elements>Guidelines 2D) to maintain an overview. - Create new guidelines for the non-supporting walls (e.g., distances of -2.20 m, -1.90 m).
[19:40] Enter walls
- Enter the non-supporting interior walls via the menu
Building>Walls>Non-supporting wall (Interior)>Between two points chain. - Adjust the wall thickness via the
Propertiesto 0.10 m. - Use the 2D and 3D views in parallel to visually check your input.
4. Checking and adjusting dimensions
[21:54] Measure distances
- Check the distances between the walls using the function
2D & Layout>Measure>Distance. - This is how you identify incorrect distances (e.g., 1.075 m instead of 1.20 m).
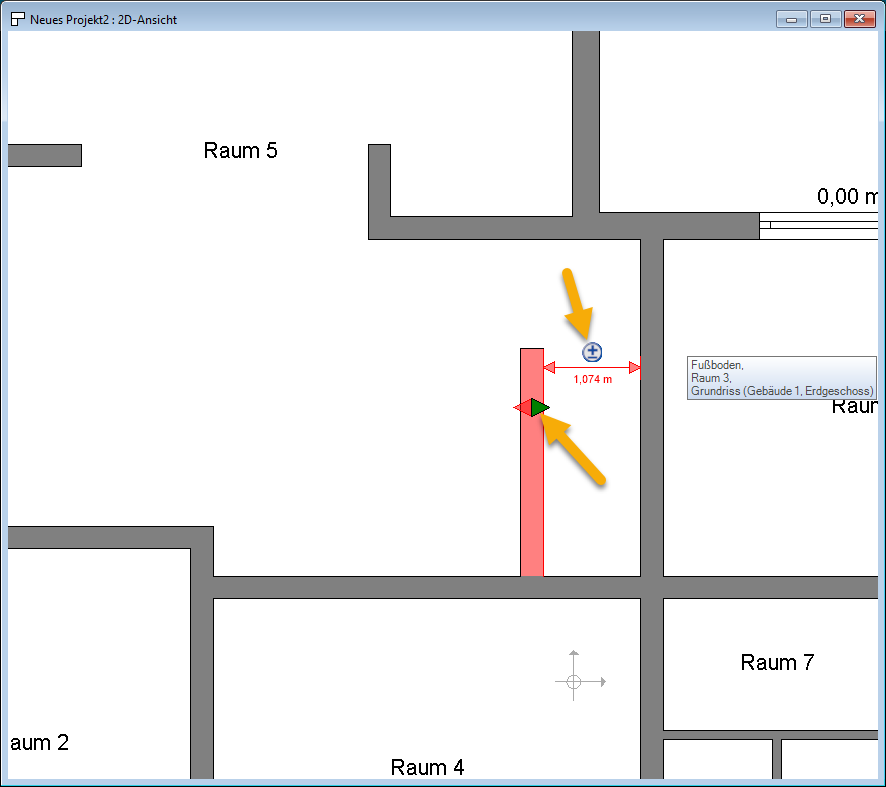
[23:25] Move walls
- Use the
Move with reference pointfunction (shortcutR) to precisely correct the position of walls. - Note: From version 10 onwards, there is a more convenient way: Simply select the wall and directly change the corresponding dimension in the displayed dimension chains.
5. Optimization of the coloring of the walls
[29:57] Project overview
- Use the
Show allfunction (shortcutHome) to display the entire floor plan centered and at maximum size.
[30:28] Coloring of the walls in the 2D view
- Differentiate supporting and non-supporting interior walls by color to improve clarity. To do this, first change the fill style for a supporting wall.
- Select a supporting wall.
Right-click>Properties>Layer construction>select Material).- Change the fill style and the desired color for the selected wall and confirm with
OK.
[31:20] Transfer filling style to walls
- Transfer the properties of the changed wall to all walls of the same type:
Right-clickon the changed wall >Transfer properties(selectGeneralandLayer construction).
[34:14] Uniform room labeling
- Also transfer the labeling properties of a room to all other rooms to ensure a uniform appearance.
6. General information
[26:40] Avoid wall segments
- Make sure to use continuous walls.
- Delete wall segments with identical thickness that are lined up directly next to each other and replace them with a single continuous wall. This avoids problems when inserting doors or windows, as 3D objects can only be inserted if the wall segment length is greater than the object’s width.
Conclusion
The video offers comprehensive instructions for entering interior walls in cadvilla®. It covers all important steps, from preparing the working environment and entering supporting and non-supporting walls to checking and optimizing. The clear structure and the use of guidelines and constructional support enable you to work precisely and efficiently.