

Are you looking to use external 3D models from the internet or other software in your cadvilla project? With the integrated 3D Object Converter, you can import, edit, and save objects in various formats directly into your catalog. Easily adjust materials, apply new textures, or remove unnecessary components before inserting the model into your floor plan. In this tutorial, we will show you step by step how to get the most out of the 3D converter and how to easily correct misaligned objects.
Important note in advance: The functions of the 3D Converter are exclusively included in the cadvilla professional and cadvilla professional plus versions.
Please note: The zoom functions demonstrated in the video are only valid up to version 5. In newer versions, you can zoom simply by scrolling the mouse wheel. For further details, please refer to our post on zooming in the 2D and 3D view.
Supported 3D formats
The converter supports a variety of common formats, including:
- cadvilla object file
- 3DS object file (*.3ds)
- Google SketchUp (*.skp)
- Collada (*.dae)
- Autodesk FBX (*.fbx)
- Luxology Modo (*.lxo)
- Cinema 4D (*c4d)
- Polygon file format (*.ply)
- Stereolithography (*.stl)
- VRML 2.0 (*.wrl, *.wrl97, *.vrml)
- DirectX (*.x)
- Caligari trueSpace object file (*.cob, *.scn)
- 3D-DXF object file (*.dxf)
- Amapi object file (*.a3d)
- Lightwave object file (*.lw, *.lwo, *.lwm, *.lwb)
- Wavefront object file (*.obj)
- ArCon object file (*.aco)
1. Import and basic navigation
[00:29] Open converter and load object
- In the upper menu, select
3D Functionsand click onLoad 3D Objects.... - The 3D Converter opens. Select your desired 3D object (e.g., a .3ds file) with a left-click in the file window that opens.
- The object is now displayed in the preview window of the converter.
[01:50] Navigation in the preview window
- Keep the left mouse button pressed to rotate and tilt the object steplessly.
- Keep the right mouse button pressed to zoom in or out steplessly.
2. Materials and first texturing
[02:01] Select components
- Click on a surface of the object in the preview window (this will be marked in red).
- At the same time, the corresponding entry is automatically selected in the register (object tree) on the left side.
[02:22] Use Material Editor
- Open the register of a component on the left side.
- Double-click on the displayed material to open the
Material Editor. - Define values here such as
Color(e.g., via the color palette),Transparency, or theDiffuse portion. - Confirm your entries with
OK.
[02:38] Assign custom textures
- In the
Material Editor, click on theTexturefield. - Select an image file.
- Find a texture on your PC and confirm.
[03:09] Note on linked surfaces
- Important: If a surface in the 3D model is linked to several other surfaces, a change (e.g., a new color or texture) automatically affects all connected surfaces.
3. View options
[05:10] optional: Change view mode
- Use the five symbols on the left above the preview window to change the representation.
- Switch between
Standard (Shadows, Textured),Flat, Shaded, orWireframeas required.
4. Clean up model and additional textures
[04:28] Remove (hide) unneeded components
- Select a disruptive object (e.g., a molding or decoration) in the preview window.
- Deactivate the checkbox for the now highlighted entry in the left register (object tree). The component is hidden.
[07:02] Adjust texture properties
- Select the object in the preview window.
- Open the texture properties in the upper right corner.
- Define exact values for
Width,Height, andRotationof the texture here.
[07:29] Textures from the catalog via drag & drop
- Open the
Catalog>Materialson the right side of the screen. - Drag the desired texture directly onto the corresponding surface of the object in the preview window while holding down the left mouse button.
5. Scaling and transfer to the project
[10:20] Adjust the size of the object
- Check the dimensions. Imported objects often have incorrect dimensions (e.g., 10 m instead of 2 m).
- Change the dimensions (e.g., the
Height) directly at the bottom left panel to a realistic value. - Right-click in the preview window and select
Show allto completely see the scaled object again. Save it again afterwards.
6. Saving Options
[10:43] and [07:55] Save object in the catalog
- Click on the
Save Asbutton directly above the preview window. - Select a save location in your catalog (e.g.,
Catalog>Objects). - If necessary, create a new folder in the catalog.
- Enter a file name and confirm with
OK.
[09:02] Note Windows User Account Control
- Note: Make sure that you have write permissions for the selected save location. Otherwise, Windows saves the file in a hidden “VirtualStore” folder, and you will not find the object in the catalog later.
7. Import object to your project
[11:14] Insert object into the planning
- Close the 3D Converter and open your project.
- Open your
Catalogin cadvilla and navigate to the folder with the saved object. - Drag the object into your 2D or 3D view.
- If necessary, rotate it with the mouse wheel, place it with a left-click, and press
Esc.
Additional tip: 3D object rotated after saving in the catalog
Sometimes it happens that an imported 3D object lies on its side or is twisted, and initially can only be saved that way. You can easily correct this condition in cadvilla in a second step:
- First, save the 3D object to be imported as a cadvilla 3D object file as described above.
- Open a new, empty project and drag the twisted 3D object from the catalog into the 2D or 3D view.
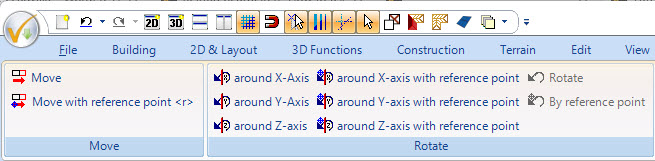
- Select the 3D object and rotate it into the correct, upright position using the rotation options listed in the menu (e.g., via the 3D functions).
- Set a 3D view as an active 3D view.
- Keep the object selected in the 3D view and click in the menu on
Export>3D Formats>3D Object File.
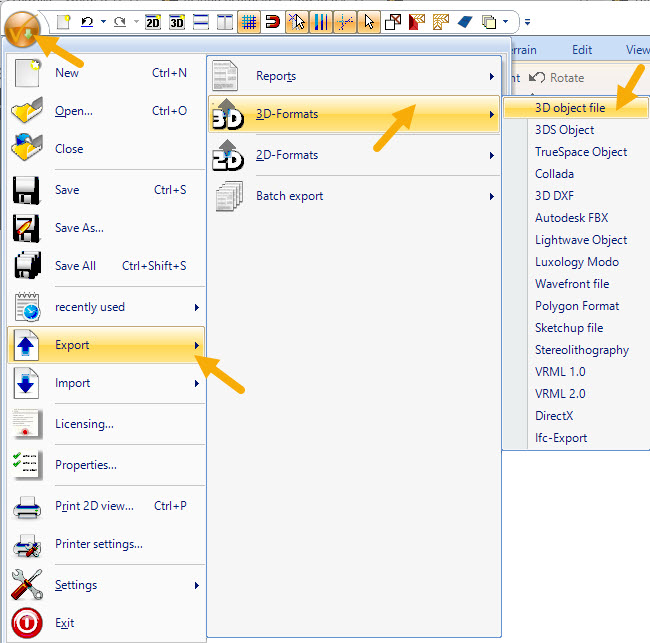
- Assign a new name or overwrite the file of the previously twisted 3D object.
- In the following window, it is mandatory to activate the option
Export selected objects onlyand then click onOK.

- The object is now permanently stored in the catalog aligned correctly.
Note: Make sure that you have the appropriate write permissions for the location where you want to save the 3D object.