

In order to print 3D pictures, 3D views, sketch views, or wireframe models in high quality, they must first be calculated and saved as an image file in the appropriate resolution. Printing directly from the 3D view (for example, by using a simple screenshot) often does not provide the desired print quality. Therefore, using the Save view as picture function is the recommended standard procedure.
Here is a brief step-by-step summary of how to set up, render, save, and ultimately print your 3D views in the best possible quality.
1. Calculate and Save the Picture
First, open the desired 3D view in your project and proceed as follows:
- In the top menu, select
File>Save view as picture.
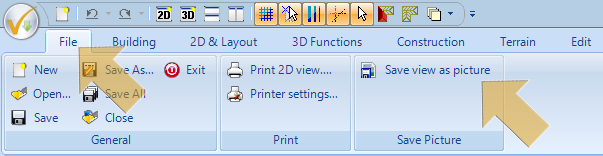
- Consequently, the “Save picture” dialog box will open on your screen.
In this dialog, you can define both the quality and the dimensions of the final image. Generally speaking, the higher the chosen resolution of the generated image, the sharper your subsequent printout will be. For good, standard printing results, we recommend a resolution of at least approx. 150 dpi. For very high-quality, professional results, you should aim for 300 dpi.
2. Determining the Correct Resolution (Pixel Size)
To determine the correct pixel values to enter into the Save picture dialog, you can easily use the following rule of thumb:
Example calculation: Let’s assume you want to print a picture that should be approximately 15 cm wide and 10 cm high on your piece of paper. Furthermore, your printer should print this image at 300 dpi (Dots per Inch).
- Conversion: 1 Inch corresponds to exactly 2.54 cm.
- Calculation:
- Width: 15 cm / 2.54 ≈ 5.91 Inches
- Height: 10 cm / 2.54 ≈ 3.94 Inches
- Pixel calculation: Now, take the calculated inch values and multiply them by the desired dpi number (300 in this case).
- Width in pixels: 5.91 * 300 ≈ 1773 pixels
- Height in pixels: 3.94 * 300 ≈ 1182 pixels
Summary for this specific example:
- For 300 dpi (high quality printing), you should enter approx. 1780 x 1180 pixels.
- For 150 dpi (medium quality printing), approx. 890 x 590 pixels would be sufficient.
3. Entering the Calculated Pixels in the Dimensions Section
Inside the dialog, navigate to the “Dimensions” area and select the Custom setting. Next, enter the calculated width (for example, 1780) in the width field. Leave the height field completely empty to avoid distorting the image, and instead make sure to check the box for Keep aspect ratio.
4. Setting the Parameters for Raytracing the Image
To achieve realistic lighting and shadows, check the box for Raytrace and then click on Settings to adjust the desired parameters for the image calculation.
In order to achieve a good initial result, set the parameters in the raytracing dialog window as follows:
- Antialiasing: Strong antialiasing
- Priority: High
For more detailed information, please also refer to our separate article “Settings and parameters for raytracing (rendering) pictures“.
5. Defining the Save Path and File Name
Within the save dialog, you must specify exactly where the generated image should be stored by navigating to File options > File name.
- Click inside the file name field.
- Carefully select a folder on your computer where you have full write permissions (for example, your “Documents” folder or the “Desktop”).
- Assign a recognizable file name to your picture and select the preferred file format (such as .JPG or .PNG).

Important note regarding write permissions: Always avoid saving pictures directly into protected Windows system folders (such as C:\Program Files\ or C:\Windows). By default, Windows denies access to these directories, which will immediately result in an error message (e.g., “Cannot access path…”). Therefore, always be sure to save your images in your personal user folders.
6. Printing the Picture
Once the software finishes rendering and the image is successfully saved:
- Open the Windows File Explorer (by pressing the shortcut
Windows Key+E). - Navigate to the exact folder where you previously saved the image.
- Open the image file by double-clicking it (it will open in the default Windows photo viewer).
- Finally, print the image using the standard print function of your viewing software (usually
CTRL+Por by clicking the printer icon).